In Brownsville, overlanders boost their 4×4 experiences with suspension lift kits, increasing ground clearance and off-road capability. Choosing durable, compatible parts from trusted brands ensures safe, effective navigation of rough terrain. This guide offers a comprehensive DIY approach for installation, emphasizing preparation, safety, and professional results using overland 4×4-parts-Brownsville.
“Elevate your overland 4×4 experience with suspension lift kits—the ultimate upgrade for navigating rugged terrain in Brownsville. This comprehensive guide explores the benefits and diverse types of lift kits, empowering you to choose the perfect components for your adventure vehicle. From understanding essential mechanics to a detailed DIY installation process, we equip Brownsville enthusiasts with the knowledge for a successful transformation. Discover how the right suspension lift can enhance performance, improve clearance, and unlock unforeseen possibilities on four wheels.”
- Understanding Suspension Lift Kits: Benefits and Types for Overland 4x4s in Brownsville
- Choosing the Right Parts: A Comprehensive Guide to Suspension Components for Your Brownsville Adventure Vehicle
- Installation Process: Step-by-Step Instructions for a Successful Do-It-Yourself (DIY) Suspension Lift in Brownsville
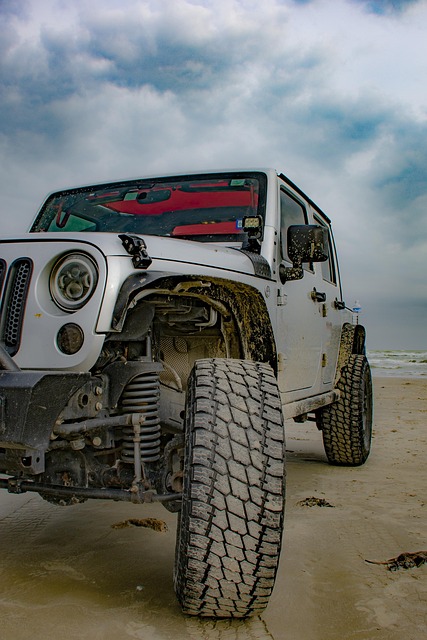
Understanding Suspension Lift Kits: Benefits and Types for Overland 4x4s in Brownsville
In Brownsville, for those who love overlanding in their 4x4s, suspension lift kits are a game-changer. These kits enhance a vehicle’s performance and capability by raising and modifying the suspension system. The primary benefit is improved ground clearance, allowing the vehicle to navigate rough terrains with ease, which is essential when exploring remote areas or facing challenging off-road trails. By increasing ride height, drivers gain better access to obstacles, rocks, and low-lying branches, ensuring a smoother and safer adventure.
There are various types of suspension lift kits available, each designed for different preferences and budget levels. From simple spring and shock upgrades to more complex systems that involve new control arms and steering components, overlanders in Brownsville can choose according to their needs. The right kit can not only enhance the off-road experience but also add a distinctive look to the vehicle, making it stand out among other 4x4s on the trail.
Choosing the Right Parts: A Comprehensive Guide to Suspension Components for Your Brownsville Adventure Vehicle
When it comes to enhancing your Brownsville adventure vehicle with a suspension lift kit, selecting the right components is key. Overlanding enthusiasts often look for parts that offer both durability and performance to navigate rugged terrain comfortably. The right suspension setup can transform your driving experience, allowing you to conquer off-road challenges with ease.
Choosing the ideal overland 4×4 parts for Brownsville involves understanding your vehicle’s specific needs. Researching various brands and models ensures compatibility and longevity. Look for lift kits designed for your make and model, considering factors like spring rate, lift height, and shock type. Local off-road communities and online forums are valuable resources to gather insights from experienced adventurers who have navigated similar paths in Brownsville.
Installation Process: Step-by-Step Instructions for a Successful Do-It-Yourself (DIY) Suspension Lift in Brownsville
Installing a suspension lift kit can be a rewarding DIY project for those looking to enhance their off-road capabilities in Brownsville. With the right parts and clear instructions, it’s possible to achieve a professional-grade modification on your own. Here’s a step-by-step guide tailored for the do-it-yourself enthusiast:
1. Preparation: Start by gathering all required overland 4×4-parts-Brownsville, ensuring you have the correct lift kit for your vehicle model. Clear the workspace of any obstructions and lay out the components. Familiarize yourself with the instructions before beginning to ensure a smooth process. Safety gear, including gloves and eye protection, is essential, especially when handling heavy parts.
2. Removal: Begin by jacking up your vehicle and securing it safely on stands. Locate the old suspension components, carefully removing each part according to the kit’s instructions. This may involve taking off wheels, brake calipers, or other parts to access the suspension. Take note of how these components are attached for future reference.
3. Installation: Replace old parts with new suspension lift components, following the kit’s diagram precisely. Ensure all bolts and fasteners are properly secured, using a torque wrench if provided. Reassemble the wheels and brakes, testing each part’s functionality before moving on to the next step. Double-check your work at every stage to prevent errors.
4. Final Adjustments: Lower your vehicle back down and test drive it to ensure all systems operate smoothly. Check for any unusual noises or vibrations that might indicate a misalignment. Make adjustments as needed, referring to the kit’s guidelines if required. Enjoy the improved ride height and off-road capabilities of your modified vehicle!
Suspension lift kits and DIY installation can significantly enhance your overland 4×4’s capabilities, allowing you to conquer challenging terrain with confidence. By carefully selecting the right parts and following a structured installation process, Brownsville adventurers can transform their vehicles into powerful off-road machines. With these upgrades, navigating rough trails becomes an exhilarating experience, unlocking new opportunities for exploration in the beautiful landscapes around Brownsville. So, get ready to hit the trail with your modified 4×4, knowing that you’ve equipped it with the best overland 4×4 parts available!